Luci’s School of Tamales

Tamales

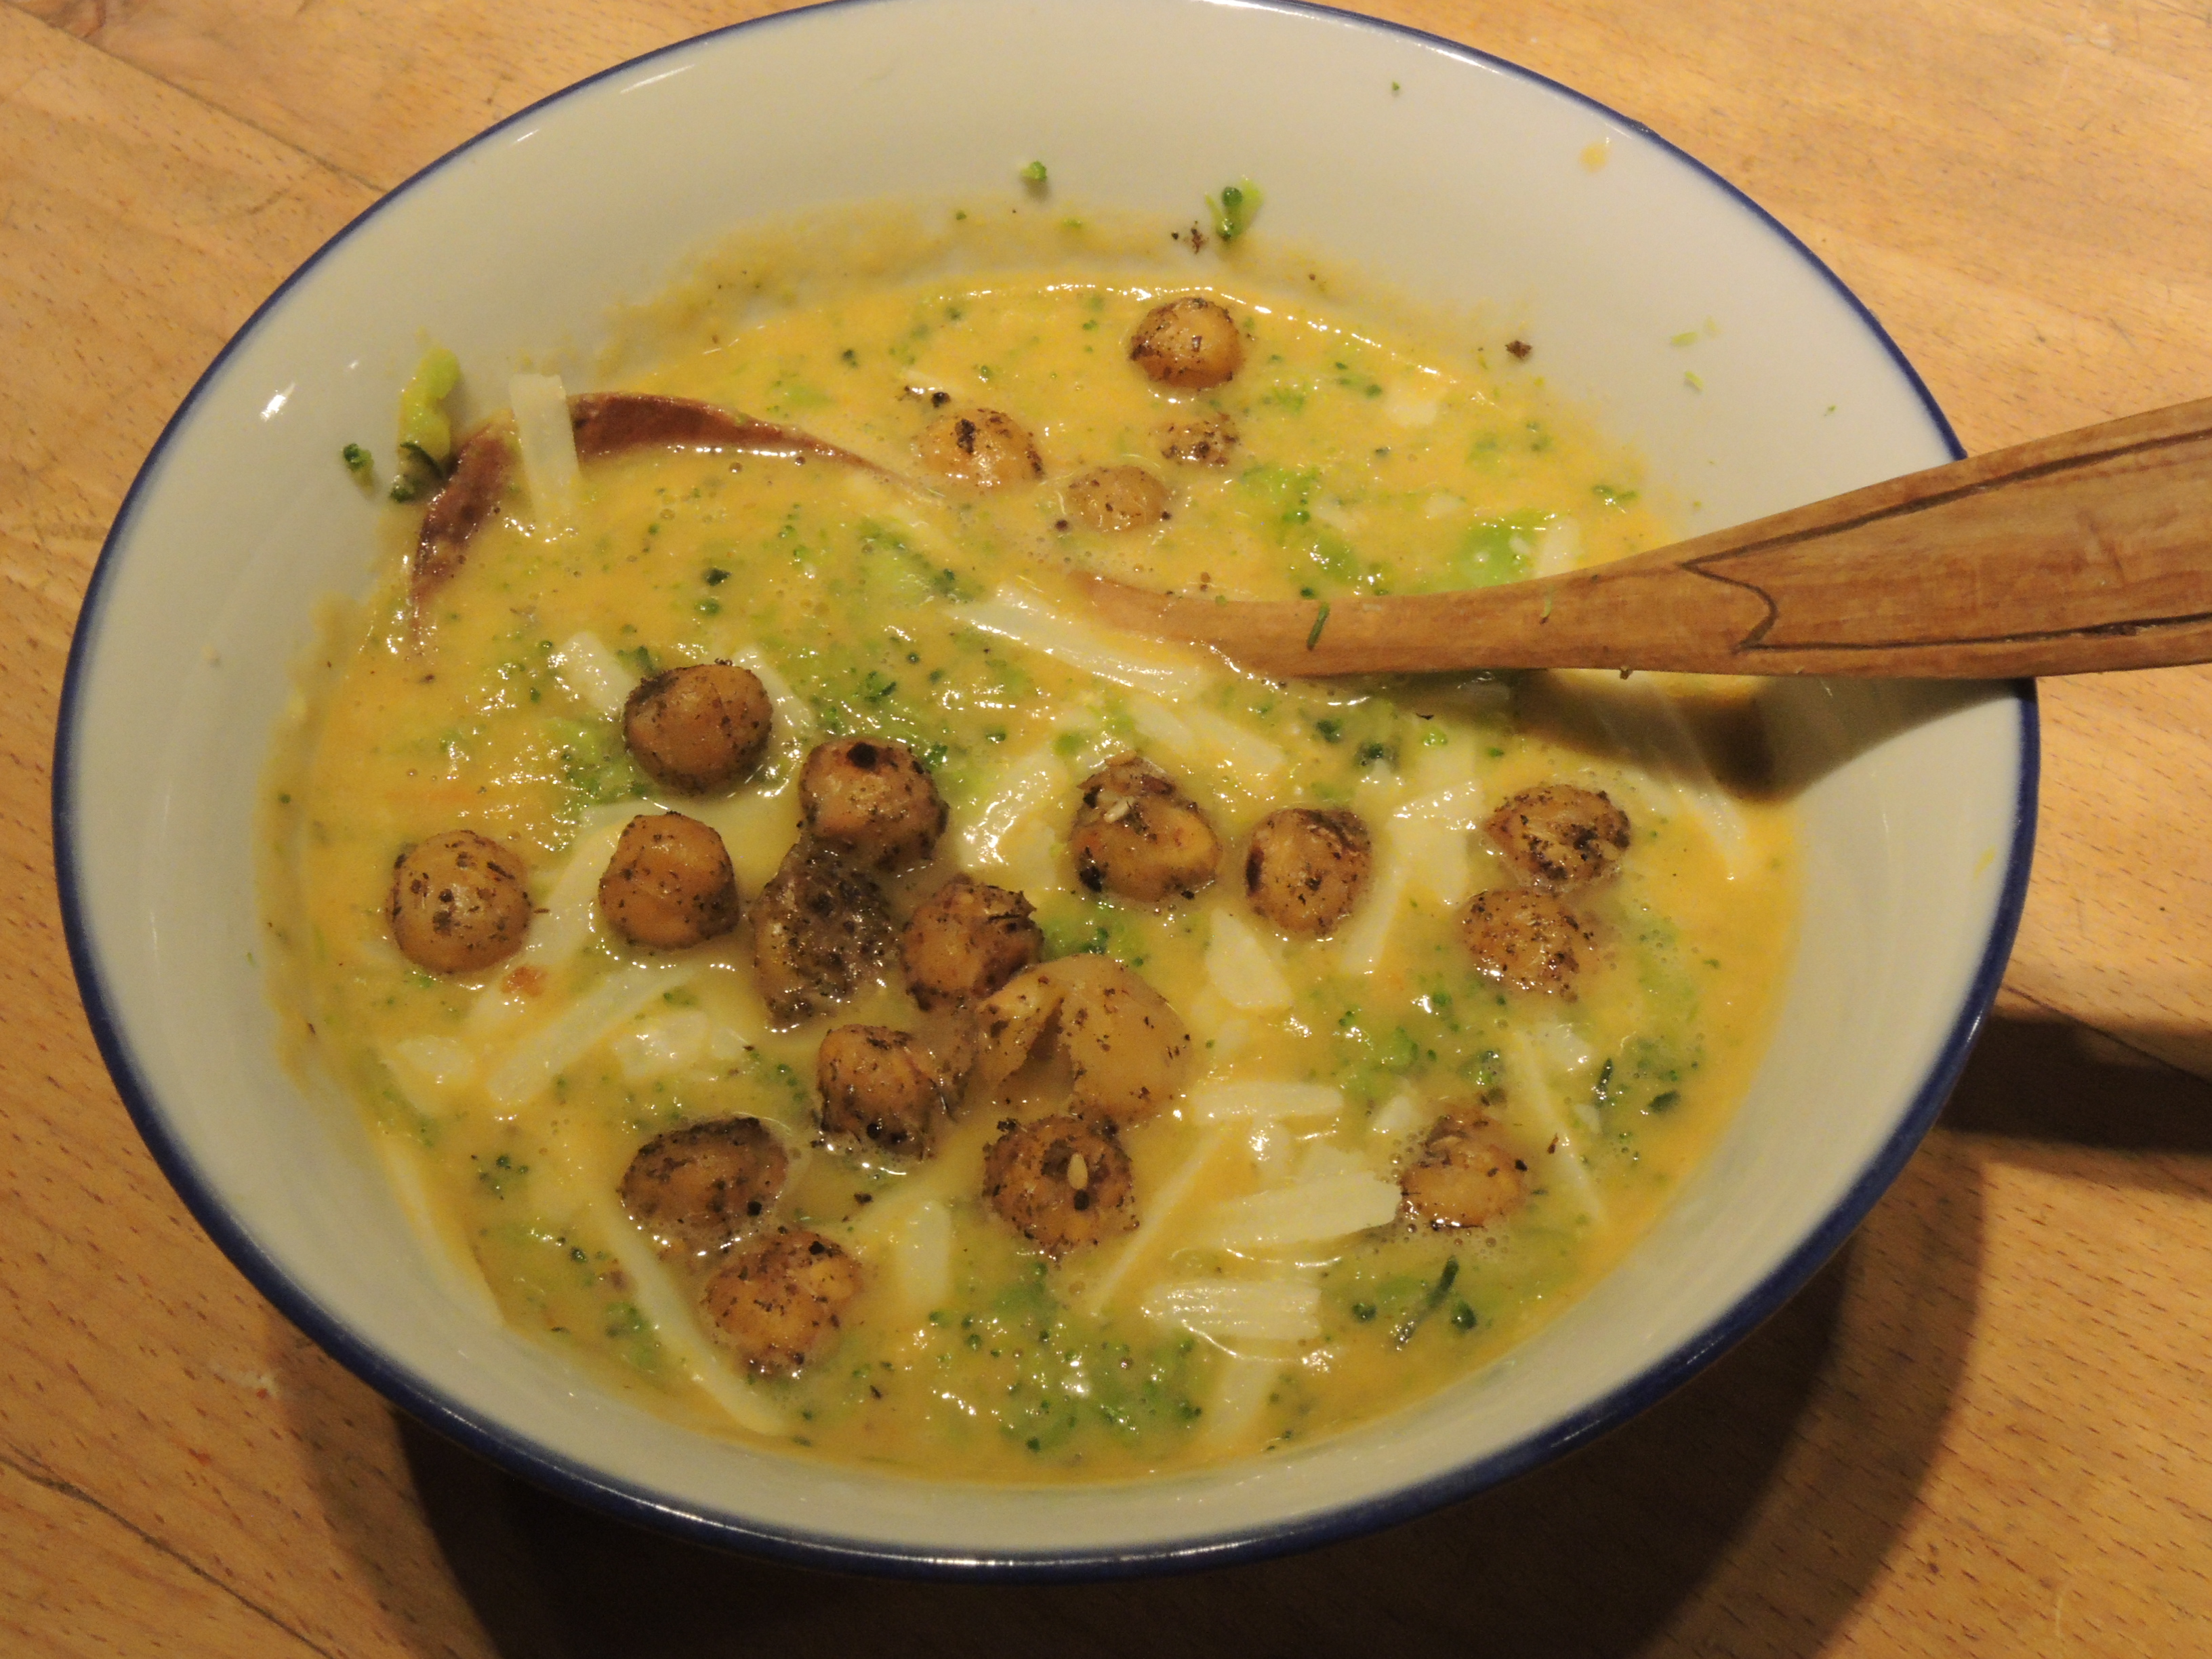
Luci and her husband Joaquin own a small Mexican grocery store where we often go to buy tortillas, masa harina, avocados, dried chiles, limes, and other ingredients for Mexican dishes. One of the first times I was in their store, I spotted several bins of unfamiliar varieties of dried beans. As I was pondering my choices, Joaquin disappeared into the back room and came back with a small bowl of freshly cooked beans. “Here,” he said, offering me the bowl. “My wife just cooked these, and you can see what they taste like. She puts a dried chile in the pot while they cook to make them taste really good. She is a very good cook.” He was right, and I bought a bag of those beans.

Tamale Ingredients

Some time later, Drew discovered that Luci makes delicious tamales on special order. A customer had failed to pick up his order, so Joaquin asked Drew if he would like to take them. Of course he did, and soon a bag of tamales was put aside in the freezer for us whenever Luci had extra. Even better, Luci agreed to come to our house and show me how to make this wonderful celebration food.

Learning to make tamales

Tamales are perfect special occasion, or fiesta food because they are richly delicious and fun to make. The preparation is somewhat lengthy and best accomplished with several helping hands and a pitcher of Sangria. The tamales need to steam for 1 1/2 hours, so you may as well make a lot and get some help making and eating them. Have a tamales party!

Sangria

That’s what I did. I invited friends to help cook and eat, Suzy made Sangria, and Luci arrived with her son Bryon to help translate for us. They brought ingredients for three different kinds of tamales and two different salsas, and soon we had pots boiling, spices toasting, masa mixing, and cornhusks soaking. A feast was on its way.

The Corn Husks

Filling Tamales

When Luci first came to the United States 20 years ago, she couldn’t find cornhusks for sale so she used aluminum foil to wrap her tamales. But dried cornhusks are commonly available now, and they make an exceptionally pleasing and aromatic wrapper. Four oz. dried cornhusks will wrap 16 tamales.

Rinse the dried cornhusks off in the sink. Place them in a large bowl and cover with hot water. Weigh them down with a plate and allow to soak for at least an hour.

Masa for Tamales

If fresh masa is available, use it. Otherwise, use coarse-ground dehydrated masa harina labeled for making tamales, rather than fine-ground masa used for tortillas. Two cups dried masa will make 16 to 20 tamales. Luci grew up making tamales in her home state of Hidalgo, Mexico. She doesn’t measure. She just pours out a small mountain of masa, covers the peak with salt, works in a few handfuls of soft lard, and adds water from the tap until the consistency feels right. The batter should be soft and spreadable, but not runny.

Ingredients: 2 cups dried masa harina for tamales, 1 tsp salt, 1/2 to 2/3-cup pure lard, 1 2/3-cup warm water or broth (possibly more), 1 tsp baking powder (optional)

Luci mixes her batter entirely with her hands. She starts with the masa and salt, and then works in room-temperature lard, adding warm water in stages until the dough is like soft cookie dough. Using broth in place of water makes a more flavorful batter.

Pork and Red Chile Sauce Filling

For the pork: 1/2 lb boneless pork shoulder, trimmed and cut into 1-inch cubes, 1 1/2 cups water, 1/2 tsp salt

Put the pork in a saucepan with the water and salt. Bring to a boil, reduce the heat and partially cover; simmer over medium-low heat for about one hour, or until the meat is fall-apart tender. Drain (reserve the liquid for making masa or other use). Shred the pork, using fingers or 2 forks.

Red Chile Sauce: 12 allspice berries, 12 black peppercorns, 6 whole cloves, 4 oz dried guajillo chiles, 3 or 4 chiles de arbol, 1/2 tsp ground cumin, 1 large garlic clove, 1/2 tsp salt

Toast allspice berries, cloves, and black peppercorns on an iron skillet over medium heat until fragrant, 1 to 2 minutes. Shake the pan to prevent burning. Transfer to a small bowl. Seed and stem guajillo chiles and chiles de arbol. Rinse the chiles, then put them in a saucepan with 1 1/2 cups water. Bring to a boil, reduce the heat, and simmer until soft—about 1/2 hour.

Put the softened chiles, cooking water, toasted spices, cumin, garlic, and salt in a blender. Puree until very smooth. Season with salt to taste.

Chicken and Salsa Verde Filling

Any kind of cooked, coarsely shredded chicken can be used for the filling. I used the meat from a pot-roasted bird cooked in our wood-fired outdoor oven. Cooking the meat slowly results in a succulent texture perfect for tacos, enchiladas and tamales.

Rick Bayless’s Poached Chicken (more or less)

Bring 8 cups water to a boil in a large stockpot. Add a thickly sliced white onion, 2 peeled and sliced garlic cloves, a chopped carrot, and 1 tsp salt. Simmer 15 to 20 minutes. Add 2 chicken legs and 2 thighs, simmer a couple of minutes, and skim any foam off the broth. Add 2 bay leaves, 2 sprigs thyme, and a sprig of marjoram. Partially cover and cook over medium heat for 10 minutes. Add 2 breast halves and skim again, Partially cover and simmer 13 minutes. Remove the pot from the heat and allow the chicken to cool in the broth for a few minutes.

Remove the chicken pieces from the broth and set aside to cool. Strain the broth and reserve for making masa or other uses. Remove the skin and pull the meat from the bones in coarse shreds. Discard skin and bones.

Luci’s Salsa Verde

I am always amazed at how fresh and delicious this simple sauce is. Easy to make, too!

Ingredients: 8 to 10 tomatillos ( 12 oz), 4 or 5 serrano or jalapeno chiles, 1 bunch cilantro, 1 large peeled garlic clove, 1/2 tsp ground cumin, about 1/2 tsp salt

Remove the outer husks and rinse the tomatillos off in water. Stem and seed (optional) the chiles. Put the tomatillos and chiles in a pot with about 1 1/2 cups water and 1/2 tsp salt. Bring to a boil. Cook at a brisk simmer 5 to10 minutes, until softened. Add the garlic clove and simmer one or two minutes more. Take off the heat and cool slightly before transferring the mixture, including liquid, to a blender. Add roughly chopped cilantro and ground cumin; blend to make a smooth puree. Season with salt to taste.

Queso Fresco Filling

Queso Fresco is an un-aged Mexican cheese that is mild in flavor and crumbles easily—sort of like a non-salty feta or a lightly salted farmer’s cheese. Combined with some sautéed vegetables, it makes a tasty vegetarian filling.

Ingredients: 2 or 3 ripe plum tomatoes (about 1 cup sliced), 2 jalapeno chiles, 1 small white onion (1/2 cup sliced), 1 1/2 Tbs vegetable oil, salt, 3 oz crumbled queso fresco or other similar cheese

Prepare the vegetables: Cut the tomatoes lengthwise into 1/4-inch thick slices. Seed and thinly slice the chiles lengthwise. Cut the onion lengthwise into thin slivers. Warm the oil in a small skillet over medium low heat. Add the onion and chiles and season with salt; sauté 5 to 6 minutes, until softened. Add the tomato slices and cook a few more minutes.

Assembly Line

Steaming Tamales

Here is where a lot of hands really help, and the party begins. You need a space to set out all the ingredients—platters of shredded meat or chicken or fish, bowls of sauces, crumbled cheese, and the sautéed or grilled vegetables.

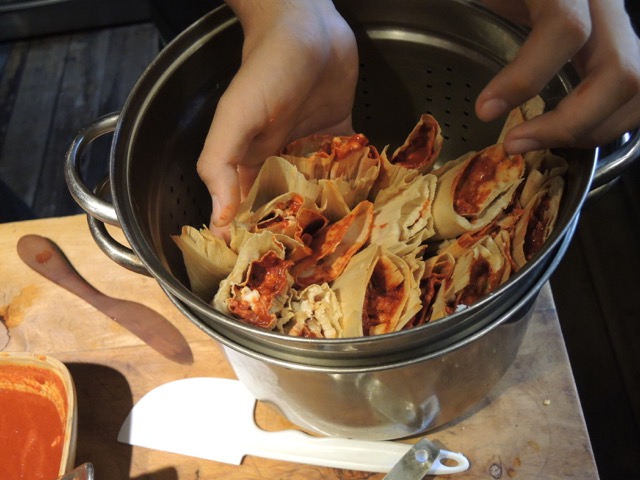
Here is how to assemble a tamale: Choose the widest, nicest cornhusks for wrappers. Start by laying out a husk on the work surface and dry it lightly with a clean dishtowel. Spread a scant 1/4-cup of the masa dough into a roughly 4-inch square across the widest end of the husk. If the husk isn’t wide enough, you can add another piece of husk to extend it. Leave a 3/4-inch border along the bottom and side edges and at least 1 1/2 inches of the pointed end of the husk. Place a few strips of chicken or meat down the center of the masa and cover it with a Tbs. or so of the sauce. If using the cheese filling, place a little of the tomato-chile mixture down the middle and sprinkle on some crumbled cheese.

Folding: Fold each long side of the husk around the filling, enclosing it like an envelope. Fold the pointed end up to close the bottom. The package can be secured by tying a narrow strip of husk around the tamal and folded flap.

The wrapped tamales are cooked in a steamer. Fill the bottom of the steamer with 1 to 2 inches of water and bring it to a boil. Line the steamer insert with some extra strips of cornhusk and fill it with tamales, folded side down, in an upright position. If you don’t have enough tamales to fill the steamer, use extra cornhusks or crumpled foil to fill the space so that the tamales remain upright.

Put the tamales into the steamer, cover the pot, and steam the tamales over medium heat for 1 1/4 to 1 1/2 hours. The husk will peel away from the masa easily when the tamales are done. Turn off the heat and let the tamales sit a few minutes before setting them out on a platter to be devoured.

Serve with additional salsa, chopped cilantro, and lime wedges, if you wish.

Other wonderful tamale fillings: Strips of roasted poblano or other peppers, grilled or sautéed mushrooms, black beans and crumbled cheese, sautéed spinach or chard…just about any shredded cooked meat or cooked vegetables mixed with a little salsa or sauce.

Eating tamales

Homage to Cabbage: Good-bye to Winter

Cabbage Head

Spring Solstice–time to say good-bye to winter and welcome to spring! It’s the time of the “hungry gap” when the supply of last year’s harvest is running low, and this year’s newly planted seeds are just poking through the soil. We’re down to a few carrots and leeks, an odd beet or two, a winter squash, some potatoes, a green cabbage, and one lonely Napa cabbage. These stalwart vegetables amaze me in their ability to come through the winter underground, in the root cellar, or in a refrigerator bin and still cheerfully offer themselves for our sustenance.

My friend Wendy Johnson tells a wonderful story about the last cabbage of winter in her book, Gardening at the Dragon’s Gate. It was her first year as head gardener–or ” Head of the Cabbages”–at Tassajara Zen Center in the early 1970’s. She planted the fall garden with scores of mysterious Asian vegetable seeds, which led to a winter diet of cabbages in its many incarnations: Napa cabbage, bok choy, mizuna, mibuna, han tsai tai, Osaka purple mustard, komatsuna, and a “long green swell…of Chinese cabbage.” Wendy and the eighty other practitioners at the monastery ate cabbage braised, baked, boiled, broiled, stir-fried, seared, sautéed, and raw in salads…”one of the longest forced cabbage feeds on record,” she recalled. Winter stretched into spring…Wendy says that her collaboration with the head cook and “the endless fields of sincere garden cabbages showed me what it is to be resolute and respectful of all ingredients.”

Whole Cabbage

Wendy’s reverence for cabbage lasted through that winter and spring until the last cabbage was harvested in May. At that point, one of the Tassajara monks suggested holding a ceremony to honor the cabbage. While the gathering practitioners chanted and bowed “the last Chinese cabbage reclined ceremoniously on its right side, its green wrapper leaves tucked demurely beneath its ample carcass…expelling a world weary sigh.” It was a fitting farewell.

My first winter garden in North Carolina was also planted with indecipherable seed packages from Japan (a gift from a traveling friend) that filled the garden beds with all manner of heading and non-heading members of the brassica family. The plants turned out to be extremely cold hearty, thriving under row covers and low, plastic-covered tunnels all winter long. Cabbages and chicories have been the backbone of my fall and winter garden ever since.

Now, I want to honor my last cabbages not with chanting and incense but with some delicious recipes to show how much I love them. I will shower them with praise and handfuls of the first greens of spring—chives, ramps, watercress, and sorrel.

Minoru’s Okonomi-yaki Pancakes

Japanese Pancakes

Okonomi-yaki are savory Japanese pancakes made with vegetables and other choice ingredients incorporated into the batter. The name translates as “as-you-like-it”, so that is where the choice comes in. My first choice for the main ingredient is green cabbage, which is also most common in Japan. There, special pancake restaurants bring the batter and an assortment of fillings including bacon, shrimp, squid, and kimchi, as well as shredded vegetables to your table and allow you to cook your own pancake “as you like it” on a hot griddle.

Our friend Minoru made okonomi-yaki for us on a visit to his home in Japan. We sat on the floor around the dining table, and he cooked the pancakes on a large electric frying pan in the middle of the table. The pancakes were filled with green cabbage, green onions, and carrot, and topped with thick slices of pork belly. Minoru shared his secret for making the most airy, delicious pancakes—he separates the eggs and beats the egg whites to frothy peaks before folding them into the batter.

Ingredients for roughly 6 large pancakes: 3/4 cup all-purpose flour, 3/4 cup water, 1/4 tsp salt, 4 large eggs (separated) Note: I usually substitute 1 1/3 cups sourdough starter for the flour and water—works great!

Filling: 5 cups finely sliced or grated green cabbage, 2/3 cup grated carrot or sweet potato, 4 or 5 thinly sliced scallions, 1/2 cup chopped fresh herbs (chives, cilantro, parsley. watercress…more for sprinkling on top)

Bacon, proscuitto, ham, shrimp, etc. are optional additions.

In a large mixing bowl, whisk together the flour, water, salt, and egg yolks to make a thin batter. In a separate bowl, whisk the egg whites to standing peaks—they should be stiff but still shiny and moist-looking.

Heat a large griddle or frying pan over medium-high heat (electric griddle is heated to 400 degrees). Stir the shredded vegetables and herbs into the batter and mix well. Gently fold the beaten egg whites into the batter.

When the pan is hot, brush lightly with oil and ladle one or more pancakes onto the surface. Place a slice of bacon on top of each pancake, if using. After about 3 minutes, flip the pancake. Cook 4 to 5 minutes, then flip again until the bacon and pancakes are cooked.

Japanese like to eat their okonomi-yaki with mayonnaise and soy sauce. I think they are great with turmeric pesto, and Drew likes them with peanut sauce. Other delicious toppings include bonito flakes (or try hot-smoked salmon), pickled ginger, and chopped fresh herbs.

Spicy Peanut Sauce

Peanut Sauce

Ingredients: 2 Tbs peanut butter, 1 1/2 Tbs toasted sesame seeds, 2 garlic cloves, 1 Tbs minced ginger, 1 Tbs tomato paste, 1 or 2 tsp chile sauce, 2 Tbs fish sauce, 1 tsp sugar, 1/3 cup water, juice of 1 lime

Use a blender to puree all the ingredients.

Japanese Salt-rubbed Cabbage Salad

Very simple—a crunchy, flavorful addition to an okonomi-yaki meal.

Ingredients: 1/2 small napa cabbage (about 1 lb), 1 1/2 tsp sea salt, 3 or 4 scallions or a handful Asian garlic chives, Zest and juice from 1 Meyer lemon (or a regular lemon or lime and 1/2 tsp sugar), pinch red chile flakes or a thinly sliced jalapeno, a large handful trimmed watercress

Cut the napa cabbage in half vertically , then into 2 quarters. Remove any tough portion of the core. Slice the cabbage crosswise into thin slivers. Toss the sliced cabbage with the salt and massage gently. Put the salted cabbage in a colander with a small plate on top for a  weight. Place in the sink or in the fridge over a bowl and let sit for 15 to 20 minutes. Squeeze the cabbage gently to remove excess liquid and transfer to a bowl

Add the finely sliced scallions or chives, lemon juice and zest, chile, and chopped watercress. Toss to combine.

My Sister’s Salad

Carrots

My sister Ellen makes this salad with daikon and carrot. I made it in honor of the last over-wintered carrots and napa cabbage, with the first garlic chives, arugula, and mint leaves.

Ingredients: 6 cups finely sliced napa cabbage, 1 cup shredded or matchstick-cut carrot, 1/2 tsp sea salt, handful chopped chives, a handful arugula leaves, a few finely chopped fresh mint leaves, 1 Tbs toasted sesame seeds

Dressing: 1 garlic clove, pinch of sea salt, 1 Tbs fresh lime juice, 1/4 tsp sugar, 1/4 tsp red chile flakes, 1 Tbs rice vinegar, 2 tsp soy sauce, 1 Tbs toasted sesame oil

Toss the finely sliced cabbage, carrots, scallions, and mint in a large bowl with 1/2 tsp salt.Set aside while you make the dressing. Using a mortar and pestle, mash the garlic and a pinch of salt to a paste. Whisk in the lime juice, sugar and chile. Add the rice vinegar, soy sauce, and sesame oil. Whisk to combine. Adjust the seasoning and toss with the cabbage. Sprinkle with toasted sesame seeds before serving.


Adventures in the Land of Kimchi

“The umami, spice, crunch, and sweetness of kimchi are the thread in which the lives of Koreans are woven.” Hannah Chung

Kim Chi in a Jar

I didn’t travel to the land of kimchi, but I have been exploring the world of microbes…specifically, the microbial world that thrives in a fermenting crock of kimchi. I got interested in learning more about making kimchi after reading Michael Pollan’s book, Cooked. In the book, he devotes a section entitled “Earth” to fermented foods. He traveled among the “fermentos”— explorers in the world of culinary microbes–to learn more about the benefits of fermentation. This led him to Sandor Katz, who has written two books about fermented foods, Wild Fermentation and The Art of Fermentation.

Katz writes that fermentation is an “everyday miracle, performed by microscopic bacteria and fungi—the “ubiquitous agents of transformation.” I discovered that the symbiotic relationship that microbes have with the human body is just as crucial and exciting as the relationship they have with plants and garden soil. Beneficial bacteria exist symbiotically in our digestive systems, where they break down foods into nutrients our bodies can absorb and help our immune systems function. Live, unpasteurized, fermented foods are the mode of delivery. Wow! Kimchi is compost for our guts.

Katz also explains that some cultures of microorganism are responsible for extraordinary culinary transformation. “Tiny beings, invisible to us, bring us compelling and varied flavors. Fermentation gives us many of our most basic staples, such as bread and cheese, and our most pleasurable treats, including chocolate, coffee, wine, and beer.” And kimchi!

Making Kimchi

I wasn’t always enamored of kimchi. Two things helped me become a born-again kimchi lover. One was the realization the kimchi is basically Korean salsa. To paraphrase John Willoughby, I had achieved the zen of kimchi and was at one with the little dishes of intense flavor. The second life-changing event was the arrival of a jar of kimchi made by Hannah Chung, owner of Simply Seoul Kitchen. She is known as the Atlanta Kimchi Queen. Friends Jim and Margaret handed me the jar and warned that it should only be opened while holding it over the sink. I followed their advice, and the kimchi erupted out of the jar with an explosion of chiles and garlic. That is live culture! I wanted to make kimchi that good.

So, what’s the difference between kimchi and sauerkraut? They are both made in low oxygen conditions by lactobacillus bacteria, which convert the sugars in cabbage or other vegetables to lactic acid. The fermentation helps preserve the vegetables and gives the finished product its tangy flavor. Sauerkraut is usually made with green cabbage, while kimchi is most commonly made with napa cabbage. Kimchi can include a variety of other vegetables or be made without cabbage at all, but is usually enhanced by modest-to-generous amounts of garlic, ginger, scallions, and hot red chiles.

Kimchi Ingredients

The Kimchi Queen’s website, simplyseoulkitchen.com, explains that the unique, tangy taste of kimchi comes from fermentation at low temperatures. In Korea, a winter’s supply of cabbage was traditionally fermented in large urns buried in the ground to maintain a steady, cool temperature. This method also represents the Korean belief that “Heaven, earth, and humanity are one.”

So…how to become one with kimchi? I looked around and found a wide variety of recipes with a confusing variation in ingredients. Some include apple or pear, anchovies and squid, fish sauce and shrimp, Korean chile flakes or “any form of hot pepper you like”, little ginger and garlic, lots of ginger and garlic, rice flour or cooked rice… Sandor Katz simply advises to “experiment with quantities and don’t worry too much about them.” But, I was a little worried about exploding jars or worse.

How to make Kimchi

Luckily, I discovered a Korean woman named Holly who blogs on a website www.beyondkimchee.com. I liked Holly immediately. She posted a photo of a bug-eaten cabbage leaf and said, “I like to see cabbage with holes in leaves…it means your cabbages are not overly pesticide.” She de-mystified the process of kimchi making with step-by-step photos and good advice, like “you need to wash the leaves to get rid of the bugs,” and you need good salt to make good kimchi—Korean sea salt, to be exact. She also explained why rice, rice flour, or even cooked potato appear in the list of ingredients for many recipes. The starch helps make the seasoning stick to the vegetables and aids the fermentation process by feeding the good bacteria. Apple and pear promote fermentation, as well. Holly fortifies her kimchi with a stock made from anchovies and shrimp heads and adds other seafood like salted shrimp, squid, or crab. “Adding extra sea flavor will make your kimchi so flavorful when fermented,” she says. “Hope you don’t skip it!”

With Holly’s enthusiastic guidance and a promising list of ingredients, I was ready to turn my bountiful harvest of Napa cabbages into kimchi.

The Basic Kimchi Process

Napa Cabbage

I followed directions for “quick kimchi,”which ferments faster and is ready to eat sooner than traditional kimchi made with whole cabbage leaves. I started with Napa cabbage, but then went on to “kimchi” almost every other vegetable in sight.

Ingredients: 2 lb head Napa cabbage, 1/2 cup coarse sea salt (preferred) or kosher salt, 2 quarts spring or filtered water (no chlorine), 1 bunch green onions (scallions)

Cut the cabbage into quarters lengthwise. Trim away any tough stem or core. Cut each quarter into about 5 pieces. The leafy part should be larger than the white stem sections. Wash the leaves well and drain in a colander. Transfer to a large bowl.

Make a brine with the salt and water, stirring until the salt dissolves. Pour the brine over the cabbage and weight with a plate to keep the leaves submerged. Let the cabbage soak in the brine 1 to 2 hours. (Holly says one, Hannah says two)Turn the leaves so that the top goes to the bottom . Let it sit another 1 to 2 hours. The cabbage should be softened, but not limp. Take the cabbage out of the salt brine and rinse in a large bowl of water three times. Taste the cabbage. It should taste salty, but not overly so. Rinse again if necessary. Drain in a colander and press out excess water.

While the cabbage is soaking, make “sea stock” and seasoning paste. You can also prepare other vegetables you might want to add in to the kimchi.

Hannah’s Vegan Seasoning Paste

Fresh Ginger

This Simply Seoul Kitchen recipe was published in the Atlanta newspaper. I scaled it down for a single 2-pound head of Napa cabbage. I also reduced the chile flakes by half in my own batch of kimchi.

Ingredients: 1/2 small onion, 1/4 cup chopped garlic, 1 Tbs minced fresh ginger, 2 Tbs sweet rice flour, 3/4 cup water, 1/2 to 1 cup Korean chile flakes (gochugaru)

Use a food processor or blender to puree the onion, garlic, and ginger. Whisk the rice flour (I used toasted rice flour) into the water. Add the onion mixture and whisk to combine. Stir in the chile flakes.

Holly’s Seasoning Paste

I adapted this version from Holly, substituting dashi for her seafood stock made with anchovies and shrimp, and fish sauce for Korean anchovy sauce and salted shrimp. I wanted to use what I had on hand…or maybe I’m squeamish.

Ingredients: 1/2 onion, 1/2 apple, 1-inch piece peeled ginger, 5 large peeled garlic cloves, 1/3 cup cooked white rice, 1 cup dashi or sea stock, 2 Tbs fish sauce (Holly uses 3 Tbs anchovy sauce and 2 Tbs salted shrimp), 2/3 cup Korean chile flakes, 1 Tbs sugar

Sea Stock: Dissolve 1 tsp instant dashi in 1 cup water. Or simmer a small handful bonito flakes and one 5-inch piece kombu kelp in 1 1/2 cups water for 8 minutes. Let steep 8 minutes before straining. Holly simmers 5 to 6 anchovies and 3 or 4 shrimp in 2 cups water to make sea stock.

Put the onion, apple, ginger, garlic, rice, 1 cup sea stock(or water), and fish sauce in a blender. Blend to make a smooth puree. Pour into a bowl and stir in the chile flakes and sugar. Let sit 10 minutes.

Seasoning Paste 3

Spice Paste Ingredients

I made this paste with red-ripe, fresh serrano and jalapeno chiles Delicious! Use a blender to puree all the ingredients. Add more water if needed.

Ingredients: 1/2 onion, 1/2 apple, 1/4 cup chopped garlic, 2 Tbs grated ginger, 4 Tbs cooked white rice, 2 Tbs fish sauce, 1 cup seeded fresh hot red chiles, 1 Tbs brown sugar, 1/2 cup water

***

Mix it Together: Chop the scallions into 1 1/2-inch pieces and mix them into the wilted cabbage. Pour 2/3 of the seasoning paste over the cabbage and mix it well. Use your hands, wearing plastic gloves to protect your skin from the chiles. Taste the kimchi and add more of the paste if needed. Any extra paste can be used to make small batches of kimchi experiments.

Put the kimchi in a glass container that has a lid. Let it ferment at room temperature for 24 hours, or longer if you prefer a more fermented taste. Store in the refrigerator, where it will continue to ferment slowly. It is best eaten within a month.

More Kimchi

Vegetable Medley

Adding chunks or slices of other vegetables into the cabbage kimchi provides more crunch and interest. Carrot, onion, radish, daikon, kohlrabi, bok choi, sweet potato, beet, and turnip all make good add-ins. They also make great kimchi individually or in various combinations.

Ingredients: 1 1/3 to 1 1/2 lbs vegetables, 1/3 cup coarse sea salt, 1 recipe seasoning paste

Method: Cut the vegetables into thin slices, chunks, or matchsticks. Cut bok choi in quarters. Sprinkle the cut vegetables with the salt. Toss and rub gently to coat all surfaces well. Let rest 1 hour, tossing gently 2 or 3 times. Rinse well and drain in a colander. Gently press out excess water. Toss vegetables with seasoning paste. Eat the kimchi fresh, or let ferment a day or two before storing in the refrigerator.

Eating Kale Moon

The Native Americans named each full moon for the characteristics of each month… Wolf Moon, Hunger Moon, Egg Moon, Thunder Moon….I declare January to be Eating Kale Moon. Winter is the season for kale. The leaves are sweeter, the green intensely nourishing… and kale is about the only thing left in the garden right now, so we’re going to eat it.

Kale

We’ve been eating lots of kale since fall—wonderful kale salads, garlicky sautés, taco fillings, and stirred into soups. But I wanted to really honor this winter-hearty green. For inspiration, I turned to the Italians. I don’t think anyone does kale better, most likely because they enjoy powerful-tasting vegetables and aren’t shy about seasoning with garlic and chiles, not to mention delicious olive oil.

I have three Italian cookbooks that reflect what Alice Waters calls “vegetable reverence.” They are Franny’s Simple, Seasonal, Italian from Franny’s restaurant in New York, Domenica Marchetti’s The Glorious Vegetables of Italy, and Cooking with the Italian Grandmothers by Jessica Theroux. All reveal Italian cooking as a celebration of vegetables …creating out-of-the-ordinary dishes with ordinary, simple ingredients and allowing vegetables to star in the menu. Simplicity and honesty in the cooking and devotion to seasonal eating are both part of the respect these cookbooks show to vegetables.

Lacinato Kale Pesto

Kale Pesto

This is an adaptation of a recipe from Franny’s. It doesn’t have to be made with Lacinato (Tuscan or Dinosaur are other names) kale, but this heirloom variety is sweeter and more tender than most and a beautiful dark black-green. Kale pesto is great for tossing with pasta—choose a wiggly shape like fusilli to hold the sauce. It’s also a wonderful with a smear of goat cheese as a topping for bruschetta.

Ingredients: 1/3 cup toasted walnuts, 1 bunch kale (12 oz), 4 Tbs lovely-tasting olive oil, 4 Tbs thinly sliced garlic cloves, pinch red chile flakes, 2 Tbs walnut oil, 4 Tbs finely chopped flat-leaf parsley, grated lemon zest of 1 lemon, 1/4 tsp sea salt, 1/4 cup freshly grated Parmesan cheese (optional)

Toast the walnuts in the oven at 350 degrees for about 7 minutes. Set aside.

Bring a large pot of salted water to a boil. Strip the kale leaves off the thick center ribs and add them to the boiling water. Cook 2 to 3 minutes, until tender. Scoop the leaves into a colander and cool with cold tap water. Drain and squeeze the leaves gently to remove excess water.

Warm 1/4 cup olive oil in a small skillet with the garlic and red chile over low heat. Cook about 2 minutes, until small bubbles rise around the cloves and they soften. Add 2 Tbs water to the pan and remove from the heat.

Transfer the kale, garlic-oil, walnut oil, parsley, lemon zest, salt, 1/2 of the walnuts, and the cheese (if using) to the bowl of a food processor. Pulse to make a coarse paste. Crush the remaining walnuts using a mortar and pestle and stir them into the pesto.

Toss with freshly cooked pasta or spread on toasted bread or slices of polenta with a few more shavings of Parmesan

Winter Risotto with Winter Squash and Kale

Winter Squash

Domenica Marchetti makes this risotto with butternut squash and Tuscan kale. I used my wonderful Zucca Berrettina Piacentina (just saying the name makes my mouth water), a more flavorful squash from Seeds From Italy. They also supplied seed for Galega de Folhas Lisas, a curly kale. I like to think the flavor is incomparable, but maybe I just grow them for the way their names roll off my tongue.

Ingredients: 3 Tbs olive oil, 1 Tbs butter, 1/2 cup diced yellow onion, 1 lb winter squash, 8 oz kale, 1/2 tsp sea salt, 2 cups Arborio or Carnaroli rice, 1cup dry white wine, 5 cups vegetable or chicken broth, 1/2 cup freshly grated Parmesan cheese, freshly ground black pepper

Bring the broth to a low simmer in a saucepan.

Warm the olive oil and onion in a Dutch oven over medium-low heat. Stir frequently for 7 or 8 minutes, until the onion is softened and translucent. Cut the winter squash into 1/2-inch cubes. Remove the center ribs from the kale and slice the leaves into thin ribbons. Add the squash and kale to the onion and stir to coat them with oil. Sprinkle with salt and cook for 15 to 20 minutes, until the kale and squash are just tender.

Add the rice and continue stirring 2 to 3 minutes to completely coat the grains with oil. Raise the heat to medium-high and pour in 1/2 cup wine. Stir constantly until it is absorbed, then add the remaining wine. When the wine is absorbed, begin adding the hot broth, 1/2 cup at a time. Reduce the heat to medium and stir frequently, allowing each addition of broth to be absorbed before adding more.

Taste the rice after 20 minutes of cooking. It should be tender, but firm to the bite—al dente. Add liquid in smaller amounts as the rice approaches being fully cooked. It should be moist but not runny. Stir in the cheese to fully incorporate it into the risotto. Remove from the heat and season with salt and freshly ground black pepper.

Zuppa di Ceci e Laciniato

Chickpea and Kale Soup

Chickpea soup

A soup from la cucina povera—poor people’s food. Drew calls it “frugal luxury.” Greens and beans are easy on the budget and combine to make a dish of luxurious flavor. In this case, a creamy and comforting background of beans is given a jolt of flavor and color from the deep bright green of kale and the warmth of chile. Zuppa is a soup made for dipping, so serve with crusty bread or croutons and a swirl of chile-herb oil. The soup also makes a fine sauce for pasta.

If you start with dried chickpeas, the liquid from cooking the beans will provide a flavorful broth for the soup. I always make a big pot when I cook dried beans. The beans cook more evenly, and the extras freeze beautifully for future use. If you are using canned chickpeas, you can substitute a homemade or commercial vegetable or chicken broth for the bean broth.

Ingredients: 1 1/4 cups dried chickpeas (you will need 2 to 2 1/2 cups cooked chickpeas, freshly cooked or canned), 1 sprig fresh rosemary, 2 bay leaves, 1 small dried red chile, 4 cloves unpeeled garlic, 3 Tbs olive oil, 1 cup finely chopped onion, 1/4 tsp red chile flakes, 2 Tbs minced garlic, 1 8-oz bunch kale (about 7-8 cups chopped), 1/2 cup chopped sundried tomatoes, 3 to 4 cups bean broth or vegetable/chicken stock, salt and freshly ground black pepper, grated pecorino-Romano for serving

Chile-Herb Oil: 4 Tbs olive oil 2 minced garlic cloves, 1 tsp red chile flakes, 2 tsp finely chopped fresh rosemary, 1 tsp finely chopped fresh thyme… (Or 2 tsp Rachel’s Sicilian herb salt with sundried tomatoes, smoked chiles, onion, garlic, and rosemary) Mash the garlic into a paste with a pinch of sea salt with a mortar and pestle. Add the chile and fresh herbs and crush with the pestle. Whisk in the olive oil and allow to sit 1 hour.

To cook dried chickpeas, start a day ahead. Rinse the beans and pick through them for small rocks. Put the beans in a pot with 1/2 tsp baking soda and add at least 2 qts water to cover. Soak them 12 to 14 hours.

Drain the soaked beans, rinse well, and put them in a large pot with 8 cups fresh water. Bring to a boil and skim off any bean froth that rises to the surface. Reduce the heat to maintain a simmer and add the bay leaves, rosemary, dried chile, and whole garlic cloves. Simmer about 1 hour, or until the chickpeas are tender but not beginning to fall apart. Stir in 1 1/2 tsp sea salt and turn off the heat. Remove the rosemary, bay leaves and whole garlic from the pot. Discard the herbs and squeeze the garlic cloves into the pot.

While the beans are cooking, strip the kale leaves off the stems and cut them into thin strips. Wash and drain. Warm the olive oil in a saucepan or Dutch oven. Stir in the onion and cook 8 to 10 minutes, until soft and translucent. Add the minced garlic and chile flakes and cook 1 minute. Add 3 cups bean broth or other liquid and bring to a simmer. Add the chopped tomatoes and kale leaves; stir to combine. Cover and simmer 10 to 15 minutes, until the kale is tender.

Set 1/2 cup cooked chickpeas aside. Add 1 1/2 cups cooked chickpeas ( if you are using canned chickpeas, add beans and their liquid) to the kale broth and simmer an additional 5 to 10 minutes. Use an immersion blender, food mill, or regular blender (be careful with hot liquid!) to puree the soup in batches. Add more beans if it is too thin, more broth or water if it is too thick. Season with salt, pepper, or red chile to your taste. Re-warm the soup if needed. Stir the reserved chickpeas back into the soup, or scatter them on top.

I like to toast the whole chickpeas in a skillet with a little herb-chile oil before scattering them over the top of the soup. If you are making croutons, you can toast them in the oven. Serve the soup with toasted bread or croutons and a bowl of freshly grated pecorino- Romano cheese. Drizzle with chile-herb oil, or perhaps a squeeze of fresh lemon.

Kale

Turmeric Pesto and Other Ways to Brighten January

Who would have guessed? Fresh turmeric is a revelation! The boring yellow powder that mostly gives color to curry powder is actually a mouth-popping, I-can’t-stop-eating-this, delicious flavor when eaten fresh (the difference between powdered ginger and fresh ginger root, only more so…). And it can grow in North Carolina!!

hawaiian red turmeric (grown by biker dude)

hawaiian red turmeric (grown by biker dude)

I was very excited when a friend from Brasstown, NC, visited and brought a jar of her homemade turmeric pesto made with fresh turmeric grown in Clay County on Qualla Berry Farm. Turmeric (Zingiberaeae Curcuma longa) is a member of the ginger family and is known as “Indian saffron” because of its brilliant orange color. John Clarke and Karen Hurtubise grow both ginger and turmeric in a large hoophouse, harvest in October and November, and sell the fresh rhizomes at farmers’ markets as well as from their own farm. They advise that the rhizomes may be stored in a warm, dry, dark place for up to three weeks or sealed in zip-lock bags to store in the freezer for a year-long supply. Contact www.quallaberryfarm.com for more information.

Qualla Berry Farm Turmeric

The fresh turmeric pesto is amazing. Can something have a yellow flavor? The flavor is sharp and earthy and somehow lets you know that it is sending good energy to all the cells of your body. I have been using turmeric powder for its antioxidant, anti-inflammatory, and healing properties, but it is so much more fun to eat the vibrant fresh rhizomes. It’s like adding a burst of sunshine to your food.

My Thai cookbook by Su Mei Yu says that fresh orange turmeric is used for its color, aroma, sweet crunchy texture, and peppery taste. When fresh turmeric isn’t available, Yu suggests substituting 1 Tbs grated carrot, 1/2 tsp grated fresh ginger, and 1/2 tsp turmeric powder for 1 Tbs minced fresh turmeric. This gives you an idea of the taste—a rather subtle, wild carrot flavor with hints of black pepper and the woods. I didn’t want to substitute; I ordered some from Qualla Berry Farm right away.

turmeric grown at Qualla Berry Farm

turmeric grown at Qualla Berry Farm

When my order of fresh turmeric arrived , I cut some up into matchsticks and started eating. The fresh flavor is not just yellow, it is orange…like some crazy carrot. The rhizomes are easy to grate or slice and can be used raw to garnish or add to dishes for maximum color and texture impact… or pound into spice pastes or add with other aromatics like ginger, garlic, and fresh chiles to stir-fries or curry. Use minced fresh turmeric in soups, dips (try it in hummous, Romesco sauce, or mixed into yogurt or goat cheese), rice and other grain pilafs, vegetable or meat braises, lentils or beans, eggs…. or make tea.

Turmeric Infusion

This recipe for fresh turmeric tea is from Qualla Berry Farm. The addition of black pepper enhances the medicinal properties of turmeric by making its healing components more easily absorbed.

Ingredients: 2 oz fresh turmeric, 1 tsp freshly ground black pepper, 2 quarts water

Chop or grate the fresh turmeric. Coarsely grind the peppercorns with a mortar and pestle or spice grinder. Bring the water to a boil and pour over the turmeric and pepper in a glass or ceramic pitcher. Allow to steep overnight or until cool. Strain into glass jars and store in the refrigerator. Strained out turmeric may be used in cooking.

Add fresh lemon juice or honey to taste. Some people enjoy hot turmeric tea with milk.

Carla’s Spice Paste

Carla Owen of Murphy, NC, provided this recipe for the growers at Qualla Berry Farm. This is a generous amount that should keep you in turmeric heaven for a while. Carla advises to eat some every day…in any dish. You can use it as a condiment, stir it into slow-cooked stews or braises near the end of cooking, or add a bit to the oil before a quick-cooked stir-fry or sauté.

Ingredients: 1 lb fresh turmeric, 1/4 lb peeled fresh ginger (or fresh ginger in season), 1-6 oz peeled garlic cloves to suit your taste, zest and juice of 2 organic lemons, 1 tsp black pepper, 1 cup olive oil

Put all ingredients in a food processor and pulse until you get the consistency you want. Add salt if you like and adjust quantities to your own taste. Store in glass jars topped with olive oil in the refrigerator.

Turmeric Pesto

Turmeric Pesto

The pesto made by our friend Linda is a simplified version of Carla’s Spice Paste. It has a beautiful pale yellow color and subtle flavor. I loved it so much I ate it by the spoonful, spread it on toast and tortillas, and put it in everything until it was gone.

Ingredients: roughly equal parts fresh turmeric rhizomes and peeled garlic cloves—let’s say 4 oz of each, 1/2 teaspoon freshly ground black pepper, 1/4 cup olive or sunflower oil, sea salt, fresh lemon juice

Put all the ingredients in a food processor and pulse to make a rough or smooth puree, as you wish. Add lemon juice and salt to taste.

Turmeric Pesto II

Turmeric Pesto II

I ran out of Linda’s pesto very quickly, so I had to make my own. I didn’t have any fresh turmeric rhizomes yet, but I did have a big jar of pickled fresh turmeric from India. It is pretty much just shreds of fresh turmeric in a salty brine, so I gave it a try. It was delicious, but on the salty side, so I mellowed it out with roasted red pepper. The color is even more joyful.

Ingredients: 1/2 cup pickled fresh turmeric, 1/2 cup peeled garlic cloves, 1/2 tsp black pepper, 1/4 cup olive oil, 1 or 2 roasted red peppers (canned are fine)

Put all the ingredients in a food processor and pulse to a rough or smooth puree. Enjoy!

Chershi Kara’a

Chershi are piquant condiments from the culinary traditions of the Jewish community of Tripoli, Libya. I learned this from Jerusalem a Cookbook, by Yotam Ottalenghi and Sami Tamimi. They made mention of a crushed pumpkin salad—chershi kara’a, which sounded like it could only be more delicious with an addition of turmeric pesto. Roasted winter squash chershi is traditional; I used wedges of roasted sweet potato.

Ingredients: 3 Tbs olive or sunflower oil, 1 large sweet potato ( 12 to 16 oz), 1 large white onion (1 1/2 cups finely chopped), 1 Tbs harissa, 2 Tbs turmeric pesto or spice paste, 1/2 tsp toasted and ground cumin seed, 1/2 tsp toasted and ground coriander seed, 2 Tbs fresh lemon juice, 1 cup chopped parsley leaves, salt

Peel the sweet potato and cut it into 3/4-inch wedges or chunks. Toss with 1 1/2 Tbs oil and sprinkle with coarse salt. Spread on a baking sheet and roast in a 400 degree oven for about 25 to 30 minutes, or until crusty brown outside and tender inside. Turn halfway through. Heat the other 1 1/2 Tbs oil in a skillet and cook the onion over medium heat until golden brown, about 10 minutes.

Scrape the onions into a bowl and stir in the harissa, turmeric pesto, cumin and caraway. Chop the roasted sweet potato into bite-size pieces and combine with the onion mixture. Add the parsley and lemon juice and toss to combine. Season with salt and freshly ground black pepper. Allow the flavors to meld 1/2 hour or more before serving.

Turmeric Turkey Meatballs in Thai Curry Broth

Ingredients: 1 lb ground turkey or chicken (dark meat), 1/2 cup finely chopped onion, 1 large free-range egg, 2 Tbs chopped mint, 2 Tbs chopped cilantro, 2 Tbs grated fresh turmeric, 1 Tbs finely chopped garlic, 1/2 tsp freshly ground white or black pepper, 1 tsp toasted and ground cumin, 1 tsp toasted and ground coriander, 1 tsp salt, 2 Tbs sunflower or peanut oil for searing

Broth: 1/2 cup coconut milk, 2 tsp Thai curry paste, 2 thinly sliced shallots, 1 cup low-salt chicken broth, juice of 1 lime (about 1 1/2 Tbs), 2 tsp raw cane sugar, 2 tsp fish sauce, 1 cup grated carrot, fresh cilantro or mint leaves for garnish

Combine all the ingredients for the meatballs in a large bowl. Mix gently with your hands. Shape the mixture into about 16 balls. Heat 1 1/2 Tbs oil in a large frying pan over medium heat until shimmering. Add half the meatballs to the pan and sear on all sides, about 4 minutes total. Remove to a plate and sear the second batch, adding oil if needed.

Use the same pan to make the broth. Add the coconut milk and bring to a simmer. Whisk in the curry paste and cook 1 or 2 minutes. Add the shallots and cook 3 to 4 minutes. Add the broth and bring to a boil. Add the lime juice, sugar, fish sauce and reduce to a simmer. Return the meatballs to the pan, cover, and cook over low heat 15 minutes, or until cooked through. Stir in the carrots and sprinkle the top with fresh herbs before serving.

Turmeric Sambal

The perfect condiment/salad to accompany meatballs, especially if you eat them with rice or wrapped in a tortilla. This is an adaptation of a Chris Schlesinger-John Willoughby recipe, “Sambal in the style of Java.” If you have a stash of turmeric pesto or spice paste, you can jump-start the dressing. Best eaten freshly made.

Ingredients: 1 1/2 cups finely sliced or shredded green cabbage, 1 1/2 cups grated or matchstick-cut carrots, 1/2 cup bean sprouts, 1 Tbs minced fresh turmeric, 1/4 cup toasted and chopped peanuts or cashews

Dressing: 1 Tbs minced ginger, 1 Tbs minced fresh turmeric, 1 Tbs minced fresh chile, 2 tsp minced garlic, 1 tsp shrimp paste or 2 tsp fish sauce, 1 1/2 Tbs toasted and cracked coriander seeds, 1/4 cup fresh lime juice, 2 Tbs palm sugar or Mexican cane sugar, 2 Tbs soy sauce, 1 Tbs pomegranate molasses, 1/4 cup peanut or sunflower oil

In a large bowl, combine the cabbage, carrots, and bean sprouts. Use a whisk or blender to combine all the dressing ingredients. Adjust the seasonings to balance the flavors—hot, sweet, salty, and sour. Pour the dressing over the vegetables and mix well. Allow to sit 10 to 15 minutes. Sprinkle with minced turmeric and toasted nuts before serving.

Fresh Cut Turmeric

Herb Salt

Sometimes a person comes into your life just like a shooting star—lighting up the sky and sending sparks into the universe. Rachel Williamson is a person like that. She stayed for a summer on our farm some years ago, and I instantly liked her so much that I gave her a couple of garden beds to tend. She had a lot of seedlings and not much space, so she planted intensively with wild companionship. I admit I had my doubts about the crowded plots, especially when the weather turned dry. Rachel hauled water and brewed 55-gallon tanks of herb tea to water her plants, and everything thrived! I am reminded of her garden each year when the volunteers from her sunflowers come up and brighten another growing season.

Rosemary

Rachel has a farm of her own now, and she makes tea for people. She moved farther north up the Blue Ridge Mountain Range to an acre of land near Afton, Virginia, where she grows herbs and vegetables and turns them into the most wonderfully flavorful teas and culinary herb blends imaginable. You can choose from “Civili-Teas” or “Profani-Teas”depending on your sense of decorum (or lack thereof). Do you feel like “Content-Mint” or want to “Cheer the F***Up”?

She also offers culinary blends with names like “Smoke”(smoked chiles, garlic and herbs—good for all things south of the border), Sicilian”( for the love of Sicily–dried tomato, smoked peppers, herbs…divine on pasta and in olive oil), “First Frost” (lemony, smoky flavor made with all the vegetables saved from the garden before the first frost, smoked and dried), and “Salt of the Earth” (lovage, parsley, onion, sweet and hot peppers, garlic, winter savory, thyme…A.K.A. “Good Salty S***”! Rachel markets her herbs mostly at fairs and farmers’ markets in her area, but offers them for sale on her website, fairweatherfarmers.com.

Seasoned Salt

I mostly avoided using dried herbs before I tried Rachel’s. Hers are the distillation of summer and are so tasty that I lick them off my hand. I pretty much sprinkle her herbs on everything–salads, soups, lentil and bean dishes, grilled or roasted vegetables, rice pilafs and various grains, roast chicken or meat, pop-corn…its an easy way to make almost anything taste more wonderful.

Here are some ideas, or excuses, from Rachel’s website for using herb blends.

Rachel’s Salad Dressing

A note from Rachel: “I don’t actually follow recipes.” I would say she learned that from me, but it is just a trait we have in common.

Ingredients: 2 tsp dried herb blend of choice, 1 to 5 cloves garlic, and 1/2 to 1 Tsp sea or kosher salt (some herb blends include salt), 2/3-cup olive oil, 1/3 cup red wine vinegar

Use an immersion blender or a large mortar and pestle and whisk to make a smooth puree of the herbs, garlic, salt, and oil. Drizzle in the vinegar last.

About garlic: The more garlic, the creamier the dressing. Use an entire head of garlic in the recipe to make a thick aioli sauce.

Winter Salad

“Nothing could make me happier in January than an intensely garlicky dressing over a giant salad of tender baby kale, arugula, and mizuna topped with copious chunks of grapefruit and avocado. It’s enough to make you dream about winter all summer long.” Rachel

Ingredients: 5-clove (at least) garlicky salad dressing, 2 to 3 generous handfuls mixed baby spinach or kale and other spicy greens per person, avocado slices, grapefruit chunks

Follow Rachel’s description and dream.

Herby Oil

Thyme

Ingredients: 1 cup olive oil, 1 Tbs dried herb blend of choice

Rub the herbs between your palms to release their scent as you sprinkle them into the oil. Stir well and allow to steep 1 or more hours before using. Alternatively, warm the herbs and oil gently in a pan over low heat for 1 to 3 minutes. Do not allow to simmer. Pour the oil into a jar or bowl and allow to steep 10 to 15 minutes before using.

Use for dipping bread or toast, drizzle on roasted or grilled vegetables, mix with beans or lentil salads, toss with pasta, brush on pizza dough, broiled fish, or grilled chicken…

Homemade Herb Salt

Herbal Salt

I ran out of Rachel’s herb blends and decided to try some batches of herb salt with the herbs still growing in my late fall garden. I still had rosemary, sage, thyme, chives, cutting celery, parsley, dill, and a few angelica leaves. Oh, and garlic.

Basic recipe: 1/2 cup coarse sea salt, 3/4 to 1 cup fresh herbs, 1/2 cup fine sea salt

Put the herbs (no stems) in a food processor with 1/2 cup coarse salt. Pulse to chop the herbs and blend them with the salt. Add the fine salt and stir. Spread the herb-salt mixture on a baking sheet and dry in the oven at 200 degrees for about 2 hours.

Sample blends: Rosemary-sage-garlic, rosemary-sage-thyme, thyme-celery leaf-chives-lemon zest-garlic-angelica…mix and match. Add freshly ground black pepper, red Chile flakes, or smoked jalapeno chiles if you like.

Awesome Potato Soup

I made this today using Rachel’s “Barcelona” herb blend. Never underestimate the value of a good potato.

Ingredients: 2 Tbs butter, 1 Tbs olive oil, 2 bay leaves, 1 1/2 cups finely chopped onion, 1 diced carrot, 2 thinly sliced stalks celery, 2 thinly sliced garlic cloves, 2 cups chicken or vegetable stock, 4 cups water, 6 to 8 cups diced potatoes (about 1 pound), 2 tsp dried herb blend (I used a blend of smoked sweet pepper, parsley, parsley, onion, ancho chile, chipotle, garlic greens, and criolla sella pepper…the “Rivanna” mix of dill, lemon thyme, pepper and winter savory would by good, too), 1 cup milk or cream, salt, freshly ground black pepper, chopped fresh parsley.

Warm the butter and oil in a Dutch oven over medium heat. Stir in bay leaves, onion, carrot, and celery. Cover and cook over very low heat for 10 minutes. Add the garlic and cook about 1 minute. Add the chicken broth, bring to a simmer, and cook 5 minutes. Add the water, potatoes ,herbs, and 1/2 tsp salt. Bring to a boil, then reduce the heat and simmer slowly until the potatoes are completely tender, about 25 minutes.

Use an immersion blender, blender or potato masher to puree the soup with milk or cream. Taste, and season with salt and black pepper to taste. Garnish with finely chopped parsley.

Cooking With Fire

“Maine…the Way Life Should be,” reads the sign as you drive into the state, and so it was in late September when we traveled there.

Coast of Maine

“The way life should be” includes the largest number of small farms of any state, and their contribution to vibrant farmers’ markets, country stores, and local eateries is easily apparent. Drew ate “the best pastrami sandwich ever” made with locally raised and cured meat and bread baked in a wood-fired oven from Maine-grown wheat at a tiny store on our way to nowhere. Maine also is the home of the renowned Common Ground Fair, held on fields owned by MOFGA (Maine Organic Farmers and Gardeners) outside the town of Unity. The fair is overflowing with beautiful produce, cheeses and preserves, wool and yarn, crafts, Maine-grown food vendors, bread and pizza bakers, sheep and sheepdogs, oxen and draft horses, goats and llamas, and whole tent full of above-average chickens. As one native Mainer told me, “You can find a lot of organic people there.”

Farmer's Market Maine

I couldn’t help myself. I bought gorgeous red and yellow sweet peppers, shiny eggplants, voluptuous red and yellow onions, and fresh-from-the-ground potatoes. And lots of garlic. From more than a dozen varieties, I chose “Georgian Crystal” (rich slightly smoky flavor), “Music”(“very big, hot”), “Rosewood”(soft colors on large, fat cloves), “Bogatyr”(marbled purple stripe…on the hot side), and Hampshire Porcelain”(good strong flavor, long storing). If you want to order some garlic, email her at vegetablesdance@gmail.com.

Our friend Kenneth was our guide at the fair, and while I was ogling vegetables he attended a presentation on super-efficient woodstoves. When we reunited, I had bags of produce, and he had a newly purchased copy of “Cooking With Fire” by Paula Marcoux. Such serendipity! We headed back to the Pemaquid peninsula– a rocky spine of land sliding into the Atlantic Ocean, where Kenneth lives with his wife Angela and their son Conrad. They live in a clearing in the woods just big enough for their small hand-made house, a tiny garden, and an awesome fire pit made from an old cast iron cauldron.

For our first night of cooking with fire, Angela fried potatoes in a pan over the hot coals, we roasted hotdogs and sausages using green sticks whittled sharp by Conrad, and toasted buns on the grate. Then we slathered on kimchi, sauerkraut, and balsamic-onion jam from the Common Ground Fair. The feast was well seasoned with wood smoke and friendship.

Balsamic-Sweet Onion Marmalade

Red Onions

Inspired by a recipe for Balsamic-Cipollini Jam by True North Farms in Maine, this marmalade has a sweet-tart flavor and is great with anything cooked on a grill, in sandwiches or omelettes, or with cheese and crackers. Or, just eat it by the spoonful.

Ingredients: 2 large sweet onions (almost 2 #), 1 1/2 Tbs extra virgin olive oil, 1 tsp chopped fresh rosemary, 2 tsp chopped fresh sage, pinch red chile flakes, 1/2 tsp sea salt, freshly ground black pepper, 2 Tbs raw sugar, 6 Tbs balsamic vinegar

Cut the onions in quarters and slice them as thinly as possible. Warm the oil in a 10-inch skillet or sauté pan over medium heat and stir in the chopped herbs and chile (optional). Add the onions and sprinkle lightly with sea salt and black pepper. Toss well and reduce the heat to low. Cook, stirring occasionally, 15 to 20 minutes. When the onions are quite soft and beginning to color, add the sugar. Continue to cook another 15 to 20 minutes, stirring often, until the onions are golden brown and caramelized. Stir in the vinegar and cook until the liquid is absorbed and the onions are soft and jammy.

Ember-Roasted Onions — with thanks to Richard Miscovich and his tips for cooking with fire.

onions

You can make this delicious jam with ember-roasted onions, if you are so lucky to have them. They are easily made in a woodstove. Let your fire burn down to coals covered with gray ash, then arrange the coals in an even layer. Place unpeeled, whole medium-size onions on top of the coals. Turn the onions over several times as they roast, and adjust their positions in the coals so that they cook to the center without incinerating the outside. They are done when easily pierced with a kebab skewer.

Make the jam: Allow the onions to cool in their skins. Peel off the skins, saving all the juice and any bits of charred skin that may be stuck. Chop the roasted onion and put them and their juices into a saucepan with the other ingredients for the jam. Cook over medium-low heat, stirring frequently, until the mixture is the consistency of marmalade.

Ember-roasted onions are a great addition to salsas, Harissa, or Romesco sauce.

Pine Needle Mussels

Maine Seaside

The next night we decided to get more adventurous and try a recipe from Paula Marcoux—Pine Needle Mussels. This required an excursion to Pemaquid Point at low tide, where the ancient rocks cradle tide pools that are home to colonies of mussels hiding in the seaweed. We scrambled down the ledges and fissures—the legacy of a long-ago time when the North American and European continents were torn apart and the rocks were up-ended in their struggle to stay with Maine. We eased our way along the slippery edges and reached into the cold water to pry the mussels from the rocks. They hold on tightly against the pounding of the Atlantic waves, but we managed to fill a bucket and headed for home.

The next ingredient (actually, the only other ingredient) is a bushel of dry pine needles. Drew and Kenneth headed into the woods to procure them while Angela and I lit a fire and tossed the Common Ground Fair vegetables in olive oil to make a roasted ratatouille over the coals.

The instructions for Pine Needle Mussels are to prepare a fire pit or cooking surface—a 3×3-foot board or large flat rock for the cooking surface (we used the cauldron). Place a potato with a slice cut off the end so that it stands up in the center of the cooking surface. Arrange the scrubbed mussels, pointy end up, so that they lean against the potato in concentric circles—a mussel mandala.

Cover the assembled mussels evenly with pine needles, as deeply as possible. Put a glowing coal or lit match in the center of the pile, on top of the potato, to light the fire. Stand back and let the fire burn; when it dies down, the mussels are ready!

That’s the theory, anyway. Our pine needles were wet from recent torrential rains, and refused to burn. After much smoldering, we piled dry twigs on top of the needles and succeeded in making a hot fire. Voila! The pine-scented, smoky mussels were the most delicious seafood we had ever tasted…even with bits of charred pine needle and assorted sea grit clinging to the shells.

After we had devoured the mussels, we ate ratatouille and bruschetta with spinach pesto. I think Conrad had a few more hot dogs.

Fall Pesto

Ingredients: 4 plump garlic cloves, 1 cup Italian parsley, 1 cup spinach or sorrel leaves, 2 Tbs fresh dill, 2 Tbs fresh chives, 1 Tbs fresh mint leaves, 2 tsp lemon zest, 1/2 cup toasted walnuts, 4 Tbs walnut oil, 4 Tbs extra virgin olive oil, 1/2 cup grated Parmesan cheese

Using a food processor, pulse the ingredients in stages to make a puree. Process the garlic and herbs, then zest and walnuts, then oils, and finally the Parmesan to make a rough paste.

Salads for the Summer Solstice

Lettuce Leaves

“Whenever I chop fresh herbs, I think of you.” That’s what my friend Ginny told me, and it is one of the most wonderful ways to be remembered that I can think of.

There’s a lot of chopping in these salads, and lots of fresh herb flavor. I made them to celebrate the beginning of summer and the end-of-spring harvest of young carrots, snap peas, spring onions, early cucumbers, fresh herbs, and abundant salad greens.

Wild Onion

My garden is a wild abundance of flowers and herbs, rubbing shoulders (if not pushing and shoving) among the vegetables. There are volunteers and galloping weeds looking for available space. It’s a jungle…and a salad maker’s paradise. I wander the pathways with a basket, picking this and that–whatever looks colorful and tasty. Then I invited friends for lunch.

Calendula

My friends and I ate salads and toasted the summer solstice. Then we jumped into summer by plunging in an icy- cold, rushing mountain stream.

Carrots in Harissa

A Middle Eastern inspired carrot salad with North African chile paste…. tone it down for a salad, spice it up for a condiment.

Ingredients: 8 to 10 young carrots (about 1 1/2 lbs), 2 Tbs olive or sunflower oil, spring onions or sweet onion (about 1 1/2 cups small dice), 1/2 tsp crushed cumin seed, 1/2 tsp crushed caraway seed, 1 tsp coarsely ground coriander seed, 3 Tbs fresh lemon juice, pinch sugar, 1 to 2 Tbs harissa (how hot is your harissa?), 1/2 cup finely chopped parsley, 1/2 cup chopped cilantro, 1/4 cup chopped chives, 2 to 3 cups baby spinach, arugula, or kale for serving

Red Onions

Peel the carrots and cut them into 1 1/2 to 2-inch long, thin matchsticks (or round slices). Blanch in salted boiling water for 1 minute (or steam about 5). Chill the carrots in ice water to stop the cooking. Drain and set aside.

Heat the oil in a skillet over medium heat. Stir in the spices and cook 30 to 60 seconds. Add the onion and a pinch of salt and sauté 3 to 5 minutes to soften. Add the harissa and stir to combine. Transfer the onion-spice mixture to a large bowl and add the carrots, stirring to coat well. Stir in the chopped fresh herbs, lemon juice, and sugar. Taste and adjust the flavors, adding salt, lemon juice or more harissa as needed.

Make a bed of greens (spinach, endive, arugula, kale…) on a platter or shallow bowl and arrange the carrot salad on top.

*Excellent Spicy Carrot Tapenade

Mix extra carrot salad with green olives, chopped pecans, capers, and garlic.

*Harissa

I make harissa in the fall with whatever hot chiles I harvest from the garden. This year it was a combination of red jalapenos, aji dulce, and a type of cayenne called Red Fire. Naomi smoked the peppers, and I blended them with spices and garlic to make the paste. Harissa can be made with dried chiles any time of year. Choose the type and quantity of chiles according to your heat tolerance.

Ingredients: 1 to 2 oz dried red chiles (ancho, Anaheim, New Mexico Red, pasilla, cayenne, guajillo, etc), 1 roasted and peeled red bell pepper, 1 tsp smoked paprika, 1/2 tsp cumin seed, 1/2 tsp caraway seed, 1 tsp coriander seed, 2 to 4 garlic cloves, 1/2 tsp sea salt, 1 tsp smoked paprika, 2 tsp red wine vinegar or 1 Tbs fresh lemon juice, 2 Tbs olive oil

Toast the dried chiles briefly on a dry skillet over medium heat. Remove the seeds and stems and put the chiles in a bowl. Cover with hot water and let soak 1/2 hour, until soft.

Toast the spices 30 to 60 seconds on the hot skillet, stirring constantly. Transfer to a mortar and grind to a powder. Add the garlic and salt and pound to make a paste. Add the paprika, vinegar or lemon, and oil. Stir to combine, then scrape the mixture into a blender, along with the soaked hot chiles and the roasted red pepper. Process to a smooth paste. Store in the refrigerator of freezer.

Sugar Snap Pea Tabbouleh

This is an herb salad made with a little bulgur wheat and snap peas replacing the usual tomatoes. It is sharp and refreshing with lemon juice, and best eaten soon after it is made. If you don’t have fine grain bulgur wheat, use regular bulgur wheat and prepare it with boiling water. Let it soak 10 to 15 minutes, then drain in a large sieve. The salad is also good made with cooked freekah or quinoa.

Ingredients: 1/4 cup fine grain bulgur wheat, 1/4 cup plus 1 Tbs warm water, 12 oz sugar snap peas (strings removed), 3 small cucumbers, 4 to 5 cups finely chopped flat-leaf parsley, 1/2 cup finely chopped fresh mint leaves, 3 or 4 thinly sliced scallions (white and tender green parts), 1 finely diced seeded jalapeno, 1/2 tsp salt, 1/4 tsp ground cumin, 1/4 tsp ground allspice, 1/8 tsp ground cinnamon, 1/4 tsp black pepper, 1 to 2 tsp pomegranate molasses and Romaine lettuce leaves for serving

Fresh Garden Herbs

Dressing: Using a mortar and pestle, mash1 garlic clove with a pinch coarse sea salt to make a paste. Add 1/4 cup fresh lemon juice, a pinch sugar, and 1/4 cup extra virgin olive oil. Whisk to combine.

Pour water over bulgur in a small bowl or saucepan. Leave 1/2 hour to soften.

Bring a pot of salted water to a boil and blanch snap peas 30 seconds. Drain and cool in ice water. Drain, chop in 1/2-inch pieces, and set aside in a colander.

To chop parsley, hold a handful of parsley sprigs together tightly with one hand and use a sharp chef knife to slice the tender stems and leaves into very thin shreds. Cut cleanly to avoid bruising the leaves. Discard tough stem ends. Thinly slice mint leaves only–no stems.

In a large bowl, mix together the softened bulgur, chopped peas, diced cucumber, chopped parsley and mint, scallions, and jalapeno. Sprinkle with salt and spices and toss to combine. Pour on the dressing, toss well, and taste. Adjust the seasoning. Drizzle pomegranate molasses on top. Serve with Romaine lettuce leaves for scooping.

*Homemade pomegranate molasses: Boil 1 quart pomegranate juice (add 1/4 cup sugar if unsweetened, or 1/4 cup fresh lemon juice if sweetened) until reduced to syrup. That’s it. You can use cranberry or cherry juice for delicious variations.

Mango-Avocado and Black Bean Salad

It appears to be mango season in Western North Carolina, so I have been making mango-avocado salsa recently and love the combination. I added cucumbers and black beans for a salad.

Ingredients: 1 can or 1 1/2 cups cooked black beans, 1 large firm-ripe mango, 1 firm-ripe avocado, 3 small thin-skinned cucumbers, 1 cup diced red onion, 2 seeded and diced jalapeno chiles, 1/2 tsp toasted and crushed cumin seed, 2 Tbs thinly sliced mint leaves, 1 cup chopped cilantro leaves and stems, 1/4 cup fresh lime juice, salt

Drain and rinse the black beans, set aside in a sieve. Peel and dice the mango and avocado. Dice the cucumbers. Put all the ingredients in a salad bowl and toss gently to combine. Add the lime juice, and season with salt.

Dill Flowers


Garden Herbs

Beef Ragu in the style of the Italian Grandmothers

“We are farmers, but we have something really beautiful.” ~Carluccia

onions

Carluccia is a farmwoman Jessica Theroux spent time with in Calabria during the year she gathered recipes for her book, “Cooking with Italian Grandmothers.” Carluccia’s deep connection to her animals and fields and to the vegetables she raised taught Jessica to pay attention to each little thing her cooking…to look and listen carefully to her ingredients, and to the people she fed.

tomatos

Our neighbor Rodney is a farmer who raises beautiful black Dexter cattle. His herd lives in our pasture and eats grass and herbs and, very occasionally, my garden. The cows are sweet and gentle and the perfect size for a mountain farm. When Rodney gave me a chuck roast from one of his steers, I wanted to honor the animal by cooking in the attentive style of the Italian Grandmothers.

There are two approaches to this ragu, depending on your schedule and/or temperament. You can mince the vegetables for the sofritto and slowly sauté them until they melt away into an “invisible layer of deliciousness”, a la Samin Nosrot, who says,” cooking is about seeking the deepest, farthest, richest flavors in everything…about extracting the the absolute most out of every ingredient…” Or, you can go the “just whack ’em up route” and create an equally delicious homey stew with hunks of flavorful vegetables.

parsley

Ingredients: 2 1/2 to 3 lbs grass-fed chuck roast or sirloin tip roast, salt and pepper, olive oil, 3 to 4 cups finely chopped or thickly sliced onions, 1 cup finely diced or thickly sliced celery, 1 1/2 cups finely diced or thickly sliced carrots, 6 to 8 thinly sliced garlic cloves, 1 minced fresh or dried hot chile pepper, 2 bay leaves, 6 sprigs fresh thyme, 10 crushed juniper berries, 1 tsp crushed fennel seeds, 2 cups canned tomatoes with juice (or 2 Tbs tomato paste and 3/4 cup water), 2 1/2 cups hearty red wine, 2 to 3 cups homemade or canned beef or chicken broth, 1/2 cup chopped fresh parsley leaves

Me with some parsley.Cut the meat into 1 1/2 to 2-inch stew-sized pieces. Season it with salt and freshly ground black pepper. Heat 2 Tbs oil in a heavy-bottomed pot over medium-high heat and brown the meet on all sides, working in batches if you need to. Add more oil if needed and sear each batch about 10 minutes. Remove the meat from the pot and set aside.

carrots

Reduce the heat to medium-low and sauté the onion with a pinch of salt until soft, 7 to 10 minutes. Raise the heat a bit and stir in the carrots and celery. Add oil if needed. Cook, stirring occasionally, 5 to 7 minutes longer. Stir in the garlic and red chile and cook 1 minute. Add the bay leaves, thyme, juniper berries, fennel seed, and wine. Bring to a simmer and cook 3 to 4 minute. Add the meat and juices back into the pot. Add the tomatoes, crushing them with your hands. Add broth and bring to a slow boil.

Stovetop Method: Reduce the heat to low and leave the lid slightly ajar. Maintain a gentle simmer, stir occasionally, and add liquid as needed. The liquid should reduce to a thick sauce by the time the meat is fork-tender, 1 1/2 to 2 hours.

Oven Method: Heat the oven to 325 degrees. Cover the pot and place it in the oven. Cook the ragu until the meat is very tender, 2 to 2 1/2 hours. If the ragu is more liquid that you want when the meat is done, strain the liquid through a colander into a saucepan. Skim off any fat and boil to reduce and concentrate the flavors. Return the broth to the ragu.

Taste the ragu and season with salt and black pepper to taste. Sprinkle with chopped parsley and serve with polenta, pasta, couscous, or bread.

Looking for Spring–a Green Lunch for Happiness

fern

I have never been so ready to see spring come after this bitter winter. I planted early seeds in the garden, and when they didn’t come up fast enough I planted more…and more. Now the garden beds are a jumble of tiny seedlings. I promise them I will sort it all out.

Meanwhile I am foraging for the first intrepid plants of the season–wild and cultivated: tiny dark green spikes of chives, crinkled mint leaves, shocking-green sorrel, fragrant chervil, lacy arugula… tender nettles, ramps, and cat-briar leaves from the woods…and abundant watercress from the branch. High above us on the ridge tops the trees are barely leafing out, but spring is happening from the ground up. The forest floor is covered with wildflowers, and lively flavors from deep green leaves are there to be gathered if you know where to look.

Ramps

Looking is half the fun. You have to walk carefully in the spring woods because there are so many little plants uncurling from their winter’s sleep. Wild iris and geranium, trillium, Solomon’s Seal, blood root, phlox, rue anemone, trout lily, bellwort…all mixed in with red-tinged poison ivy leaves, stately cohosh, fairy kingdoms of moss, and tangles of fern fronds. I even found some showy orchis and the newly unfolded leaves of ginseng.

Two Shades of Orange Salad

beets

Golden beets (found in miraculously good shape after hibernating in the vegetable bin of the refrigerator all winter!) and oranges provide the two shades of orange for this salad–a riff on a Moroccan ” two shades of red salad” made with beets and tomatoes, found in the cookbook Flatbreads and Flavors by Alford and Duguid. The salad also borrows from the orange and beet salsa from Jerusalem, the cookbook.

Ingredients: 2 medium golden beets, 1 orange, 1/2 cup finely chopped red onion, 1/4 cup chopped kalamata olives, 1/4 cup chopped parsley, 1/4 cup chopped cilantro, 1/4 cup chopped chives, 2 Tbs chopped fresh mint leaves, 3/4 tsp coriander seed, 3/4 tsp cumin seed, 1/2 tsp smoked paprika, 1/2 tsp red chile flakes, 1 garlic clove, 2 to 3 Tbs fresh lemon juice, 2 Tbs extra virgin olive oil or walnut oil, pinch of sugar, salt and freshly ground black pepper, 2 cups watercress or arugula leaves, 1/4 cup toasted walnuts

Place the beets in a saucepan, cover with plenty of water, and bring to a boil. Partially cover and cook at a low boil for 25 to 30 minutes, or until the beets are easily pierced with a sharp knife. Drain, cool, and peel before cutting into 1/2-inch dice.

Peel the orange and remove all the pith and seeds. Slice the orange about 1/4-inch thick. Separate the slices into segments, removing tough connective membranes. Add the orange pieces and their juice to the diced beets, along with the onion, chopped olives, and herbs.

Toast and grind the coriander and cumin seeds in a mortar and pestle. Add the paprika and chile. Add the peeled garlic clove and pound to a paste with 1/4 tsp salt. Whisk in the lemon juice and oil. Pour the dressing over the beet mixture. Toss gently and season with salt and pepper. Arrange the salad on top of a shallow bowl of watercress or arugula leaves and sprinkle with walnuts.

Chickpea Soup with Watercress and Wild Greens

Nettles

Mild-flavored chickpeas combine well with deep green-flavors of a wide variety of greens including spinach, chard, and kale, as well as foraged greens like nettles, lambs quarters, and coneflower. Watercress adds a welcome bite, and the North African spice blend ras el hanout adds spicy fragrance.

Ingredients: 2 1/2 Tbs olive oil, 1 thinly sliced large onion, 1 Tbs finely chopped garlic, 2 Tbs finely chopped ginger, 2 cups cooked chickpeas, 2 cups vegetable broth or chickpea cooking liquid, 4 cups chopped greens (about 5 oz), 6 cups watercress leaves (6 to 7 oz), 2 tsp ras el hanout, 1/4 tsp ground cinnamon, salt, lemon wedges

Warm the olive oil with the onion in a Dutch oven or other soup pot over medium heat. Cook, stirring occasionally, until the onion is completely soft, 8 to 10 minutes. Add the ginger and garlic and cook about 1 minute. Stir in the ras el hanout, cinnamon, chickpeas, and broth and bring to a low boil. Add the chopped greens and watercress and simmer until the leaves are wilted and tender, 1 to 2 minutes.

Use a blender or food processor to blend the soup to a smooth puree. Return to the pot to reheat. Season with salt to taste. Serve with lemon wedges and thick yogurt.

Fava Bean Pesto with Sorrel

Sorrel

This is a green salsa/spread for spring…a great topping for bruschetta or crackers. I added frozen edamame from last year’s garden for brighter green color.

Ingredients: 1 cup peeled fresh fava beans, 1/2 cup shelled edamame, 1 large garlic clove, 1/4 tsp kosher or sea salt, 2 Tbs chopped fresh mint leaves, 1/4 cup chopped sorrel leaves, 1 Tbs fresh lemon juice, 2 Tbs extra virgin olive oil, 2 Tbs Pecorino Romano, freshly ground black pepper

Cook shelled fava beans in salted boiling water until tender, 1 to 2 minutes. Drain and cool in cold water. Drain again and slip off the outer skin.

Chop the garlic and put it in a mortar with the salt. Mash with the pestle to make a paste. Add the rest of the ingredients gradually and use the mortar and pestle or a food processor to make a chunky, spreadable pesto.

Spring Green Kuku

Dandelion

A kuku is the Iranian version of a frittata, and my Silk Road Cooking book says that a fresh herb kuku is eaten on the spring equinox to symbolize rebirth, fertility and happiness.

Arugula

Ingredients: 6 free-range eggs, 2 Tbs cream, 1 Tbs flour, 1/2 tsp baking powder, 1/2 tsp salt, 1/2 tsp freshly ground black pepper, 3 Tbs olive oil, 1 cup chopped spring onions (including green stems), 1 cup thinly sliced ramp leaves (chives or garlic chives), 3 cups chopped nettle leaves (baby kale or spinach), 1/4 cup finely chopped parsley, 1/4 cup finely chopped chervil (fennel or dill), 2 Tbs chopped fresh mint, 2 Tbs currants or dried cranberries

Preheat the oven to 250 degrees. In a large bowl, whisk together the eggs, cream, flour, baking powder, salt and pepper. Set aside.

Heat 2 Tbs olive oil in a 10-inch oven-proof skillet. Add the onions to the skillet and cook 4 to 5 minutes. Add the ramp leaves or chives and cook 1 minute. Add the greens and cook until just wilted. Stir in the fresh herbs and currants.

Stir the onion-herb mixture into the beaten eggs. Clean the skillet and return it to the heat and add the remaining 1 Tbs olive oil. When hot, pour in the egg mixture and transfer the pan to the oven. Cover and cook 15 minutes. Remove the cover and continue to cook about 5 more minutes, until the eggs are just set.

Cut the kuku in thin slices and eat with bruschetta or flatbread, with a dollop of yogurt sauce.

Yogurt Sauce

Ingredients: 1 cup thick yogurt. 1 finely chopped garlic clove, 1/4 tsp salt, 1/4 tsp freshly ground pepper, 2 tsp fresh lemon juice, 2 tsp sumac powder, 1/2 tsp dried mint, 2 Tbs finely sliced chives

Put the garlic and salt in a mortar and mash the garlic to a paste. Add the rest of the ingredients and stir to combine.